
Have you checked this website out? I was searching the internet for clam chowder recipes for an upcoming post about Massachusetts, and found the most geektastic food website ever. Cooking for Engineers was started seven years ago (yes I am quite late to this bandwagon) by Michael Chu of the Silicon Valley. He originally wanted a place to backup his recipes, and a server problem wiped out most of them. Then he discovered Blogger and a whole new avenue opened up for him.
He outlines his recipes in a way similar to how I outline mine in my State-by-State and Food Ethnography posts, only much sleeker and more streamlined than mine. Then he streamlines the recipe even more by putting it in a nice neat little box (for example, his recipe for lemon bars). I guess it takes an engineer! I wish more recipes were diagrammed out like these.
Saturday, August 20, 2011
Cooking for Engineers
Thursday, May 12, 2011
Tenderloin that falls apart!
I made a pork tenderloin in the slow cooker yesterday. I had not made one before so I scoured the internet for an interesting recipe. I went with one of those "generic recipes" on one of those "generic recipe sites" like AllRecipes.com. The one I went with, called "Amazing Pork Tenderloin in the Slow Cooker", uses garlic, soy sauce, red wine, water and a packaged onion soup mix. Sounds salty? It's not as salty as it seems. Commenters suggested tinkering with the cook time, which I tried at first - instead of four hours on LOW, I was set to do it on HIGH. Half an hour into it, I reset it and did the final 3 1/2 hours on LOW.
The pork tenderloin was tender. I would not call it "fork split" tender, which it wasn't unless you really push down hard on that fork. One thing that aggravated me, however, purely affected the aesthetics of the dish: when I took it out, the entire tenderloin split in half lengthwise. This in itself isn't such a problem, except that I was hoping to cut it into rounds and use them in a future recipe that I needed tenderloin rounds for. Ah well. At least it tastes good and isn't dry (it's definitely not dry), and was on sale.
Sunday, March 06, 2011
Snacking State-by-State Mashup 2: Denver Omelette Roll and Delmarva Roll
Sushi takes a while to make, so I don't plan to make much of it in the near future. So to use up the rest of that sushi rice I decided to make a few more maki rolls - one of the many California recipes I tried out - out of some ingredients from my Colorado, Connecticut and Delaware posts.
Both rolls require making some sushi rice, the procedure for which you can find in my post for Southern California. I had enough sushi rice left for a little more than two rolls.
The mash-up recipes: Denver Omelette Roll and Delmarva / Clambake Nation Roll
Serves 1 or 2
Ingredients (state flag indicates State-by-State post where ingredient was featured. Ingredients with no flag were not specifically used for any one post): sushi ricesushi noririce wine vinegar (worked fine for me, though technically you should use rice vinegar instead)sesame seeds
 a few strips red bell pepper1 egg a few strips ham steak
 a few strips chicken breast3 oysters
 6 to 8 whole baby clamsa few slivers peacha few pieces avocado
wasabi mayonnaise
tempura batter:
1 cup flour
1 cup ice water
1 egg
After preparing the sushi rice, place it on a slice of nori on your bamboo sushi mat - this time I just put the bamboo mat in a gallon-size ziploc bag instead of saran wrap. Sprinkle with sesame seeds, and carefully flip over the nori so it is facing up and the sushi is facing down.
Maki Roll #1: Denver Omelette Roll
Next come the roll making itself. For the first roll, I wanted to revisit that first Denver omelette I made. In a way, I deconstructed it, got rid of the cheese, and put it in a roll.
Into this roll go the following: about half of a small one-egg omelette, a few strips of ham steak, and a few strips of red bell pepper. Green bell pepper is more authentic, but I don't enjoy eating it, so it's out. A little avocado on top (maybe I should have put it on after rolling it up instead of before), and then a little wasabi mayonnaise complete this roll.
 The Denver Omelette Roll
Maki Roll #2: Delmarva (or Clambake Nation) Roll
The second roll I made used ingredients from my Connecticut and Delaware posts - clams, oysters, chicken and peaches (all found in Delaware, and the clams and oysters also grow in Connecticut). Both states are in the RAFT Nations' "Clambake Nation", spanning coastal New England, New York City, New Jersey and much of the Delmarva Peninsula. A catchier name, however, may be the "Delmarva Roll", which is why I'm trending towards that one. Call it Fred for all I care though. The name's not that important.
For the Delmarva Roll, you'll need to make a tempura batter. This is fairly simple, so long as you use ice cold ice water. I just filled a bowl with water, stuck it in the freezer and occasionally broke the top if it froze over, until I needed it. Then mix it with a cup of flour and a beaten egg. Dip whatever you want to deep fry in the tempura batter. For example, for this roll I tempura-fried the clams and freshly shucked oysters. yes, the oysters met their end very quickly in the middle of fast-fried tempura batter. PETA will not like this recipe.
 Tempura clams, tempura oysters, and tempura crunchies, better than what you get at Long John Silver.
Into this roll go the following: the tempura clams (I did eat a few on the side - you'll use about 5 or 6), the tempura oysters (I used 2 and ate the third. I couldn't help it), small slices of peaches (about four) and a few slivers of cooked chicken breast. Again, roll it up, and top with a few more thin slices of peach.
 The Delmarva Roll, or Clambake Nation Roll
Sunday, January 09, 2011
Snacking State-by-State Mashup 1: Nopal and Cedar-Roasted Catfish Stir-Fry
One problem I have found with this Snacking State-by-State series I am doing is the plethora of leftovers. While some do store or freeze well (catfish AND sockeye salmon in the freezer), I only have so much room in my freezer, fridge and pantry. I mean, let's face it: that jar of nopal cactus is going to sit in my fridge for quite some time. I'll probably have it when I get to my New Mexico post sometime in early 2012.
So it behooves me to do something creative with these disparate ingredients. Inspired by the otherwise irritating show Chopped, I will take a bunch of ingredients that I have leftover from my first four State-by-State posts, and put them together in a recipe. Sort of a state by state mashup, minus the douchebag hotshot contestants. Or douchebag arrogant judges.
The first one seems best suited to a stir-fry.
The mash-up recipe: Nopal and Cedar-Roasted Catfish Stir-Fry
Serves 2 as a main or 4 as an appetizer
Ingredients (state flag indicates State-by-State post where ingredient was featured. Ingredients with no flag were not specially found for any one post): 1 catfish fillet
 1/2 cup nopal cactus, minced
 1/2 cup long grain white rice per person, cookedmeat from one ham hock (optional: skin & fat from ham hock)
 1 tablespoon parsley-lemon compound butter1 poblano chile, roasted, skinned and minced1 cedar plank, seasoned1 flour tortilla, cut into strips and fried until crisp (optional)
1 small onion, sliced
1 - 2 cloves garlic, smashed
1 Roma tomato, diced
1 small handful parsley, chopped
3 tablespoons olive or peanut oil
Prepare the cedar plank for baking in the oven, and lightly smear the compound butter on the catfish.
 Like so.
Bake for 5 to 7 minutes at 350 degrees, taking care not to cook through (you will finish cooking it later). Remove and cut the catfish fillet bite-sized into pieces, and set aside.
 This is not catfish.
Heat oil in wok or saute pan, then add the following in succession:
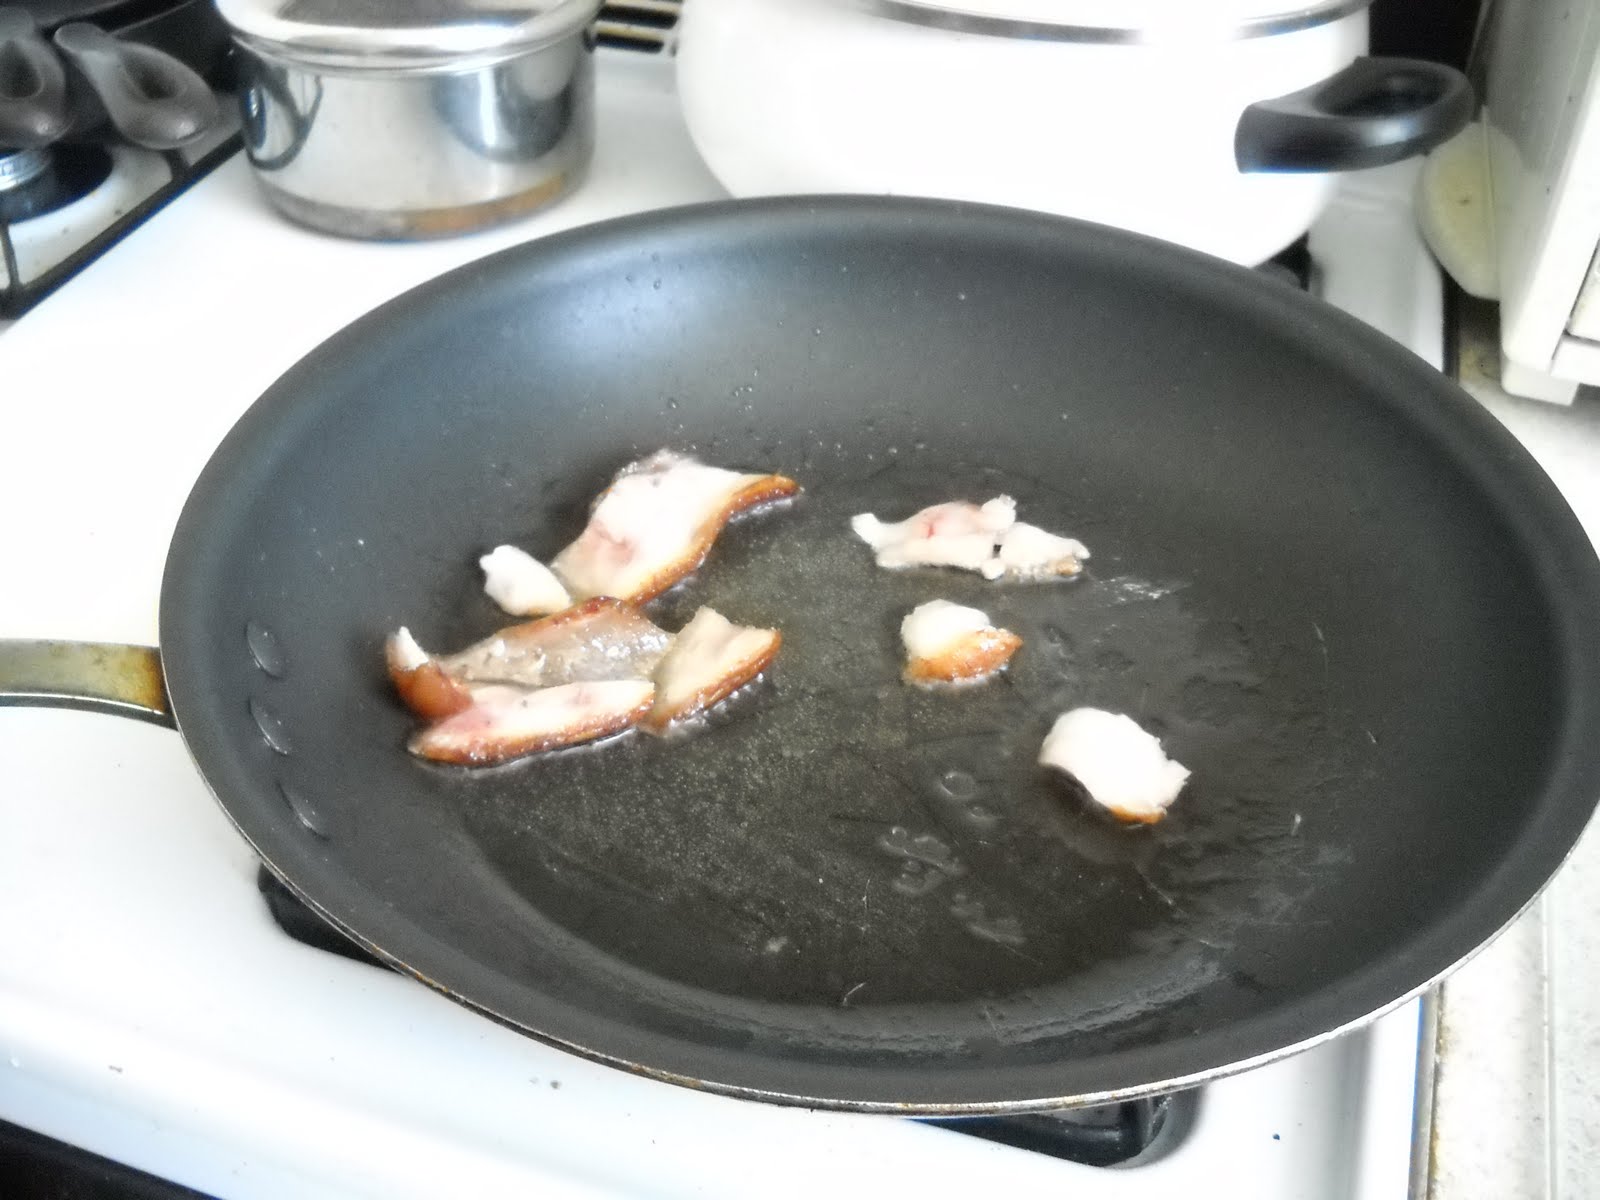
1) optional fat & skin from ham hock for 30 seconds. Then remove it if you use it.

2) onion and garlic for 30 seconds

3) meat from ham hock for 1 minute

4) nopales, tomato and poblano chile for 1 minute

5) catfish for three minutes or until cooked through
Serve with rice. As an optional garnish, add flour tortilla strips and parsley.

I found this stir fry to be a little on the goopy side, specifically due to the nopal. Again, the nopal flavor was more muted than I remembered from the last time I ate it, but it was a bit more distinct this time than in the recent egg dish I made when I looked at Arizona cooking. What I found with the catfish was the same with the salmon: the cedar flavor was extremely subtle, but still there, even though I only roasted the catfish for 7 minutes, and then stir-fried it with so many different ingredients. The one disappointing thing about this dish, for me, was that the cedar-flavored catfish didn't really blend in with the vegetables, or viceversa. They both fight for attention. I don't consider the dish a failure per se. Everything tasted good and at least the catfish had a very nice texture, if not the nopal (but that's more the fault of the ingredient). I probably wouldn't make this again, but if nothing else, it was a good way to use up some ingredients. Now the ham hocks, nopal and poblano chiles are all used up!
Monday, November 08, 2010
I made a pie...
I have not made very many pies in the past. I have made even fewer with my own homemade pie crust. It is, well, kind of a pain the ass to roll out. Plus, you have to do all the chilling in the refrigerator, and it just takes a major chunk out of my very busy day.
But I broke down and made one again. This time, it was with apples! Gorgeous, mouthwatering apples! The apples came from the Towson Farmers' Market, ending until May on the Thursday before Thanksgiving (note that, Towsonites). The folks who hawk apples there are very helpful in recommending apples for a pie. I admit: I know next to nothing about pie apples. I know next to nothing about any apples, to be perfectly frank. I've never eaten many in the past. It's not my favorite fruit. But I'm willing to learn.
The pie crust recipe came from John Shields (double crust pie recipe, Chesapeake Bay Cooking). The filling recipe came from Tyler Florence, courtesy of the Cooking Channel (my new favorite cooking channel, when I am at house that has cable). I just wish the recipe itself had been a little more thorough in how you prepare the filling. It's mentioned as an afterthought at the end. Tyler, what the fudge!? I mean, I figured it out, but what if somebody is not as resourceful?
Anywho, I am quite impressed with my first pie. Though I added a little too much salt to the crust (what you get for eyeballing the salt, dude), the pie is just wonderful, with the tartness of the apples meshing nicely with the cinnamon, nutmeg, brown and white sugars and - gasp - butter that coated it all. I've never been too hot on apple pie, but if I keep making more of these, I'll get hot on it. Oh yes, I will. Especially with some vanilla ice cream from Trader Joe's.
Sunday, September 26, 2010
Sabbatical Flashback 1: Lidia Bastianich's Tomato Sauce
Again, I feel quite honored that the City Paper named TBS to its Best of Baltimore list for 2010. You just don't expect to hear that too often.
But alas, I am still on a sabbatical from the blog. And yet, it seems like now is a better time than ever to show readers some of what I do here. So over dinner last night (the Carlyle Club has gotten surprisingly inexpensive, especially their dosas, none of which reaches $10), I shot around some ideas with my friends Eric & Alan over what to do. It made sense, a la Minx Eats, to do some flashback posts.
So over the next few weeks (about once or twice a week), as I focus on family and work issues and recover from burnout, I will be bringing some of my favorite posts back for you to read. New readers: this is some insight into how the mind of this blogger works.
The first flashback post dovetails nicely with Baltimore's Book Festival, as it was the inspiration for the post. The recipe in this post is still scrawled on a piece of note paper hanging in my kitchen. Two things to note: as you recall, BBF '08 was subject to an absurdly hard downpour, and it was apparently more difficult to find San Marzano tomatoes in the supermarket than it is now. Hell, I can go to Giant and get them now. I think.
Lidia Bastianich's Tomato Sauce
(originally posted Thursday, October 2, 2008)
Inspired by Adam Roberts' cooking demo at the first-ever underwater Baltimore Book Festival on Saturday, I went ahead and made pasta sauce. It was the first time I had ever done this, though I have made other tomato-based sauces before. These were usually of the vindaloo and murgh makhani varieties. One would think the ancestors would get me to make an ancestral tomato sauce at some point, but nooooo. Then again, food-wise I best remember my Italian-American grandmother for her Thanksgiving stuffing, and the little pot of coffee she cooked every morning. It wasn't even a tea pot - just a little aluminum saucepan. Perhaps she did make napoletana food (her parents were from a little mountain village outside of Salerno, near Naples), but I never had the fortune to eat it.
 Where was I? Oh yes, pasta sauce. I hunted down the Lidia Bastianich oeuvre at the Towson Library and found the recipe that Adam had made for Saturday's demo. I finally found said recipe in her book Lidia's Family Table. For this recipe, the words "SAN MARZANO TOMATOES" jumped out at me. I had heard the Amateur Gourmet utter these same words the other day, so I went a-searchin' for some San Marzano maters. I found none. Not in Trader Joe's. Not in Super Fresh. I almost got to Whole Foods but it was late and I couldn't be bothered.
I finally did find two cans of organic San Marzano tomatoes, canned by Racconto. Their Bella Terra brand of peeled organic tomatoes have little in the way of preservatives. And what they lack in preservatives they more than make up for in two areas: taste and price. They are some tasty tomatoes. And they are some expensive tomatoes. One 28-oz can cost me $3.30! That's over 1 1/2 times the price of the super-expensive 28-oz can of "organic" tomatoes sitting right next to them. I was deterred enough to buy only one can, since I already had two cans of the local Sun of Italy brand peeled "Italian-Style Whole Tomatoes" waiting for me at home (about $1.75 each). I grew up with Sun of Italy, so I figured they had to be the best the area could muster.
 Always the bridesmaids, never the bride...
I wasn't sure how each would fare against the other, since I had no idea where the Sun of Italy tomatoes came from. So I opened each and tried them.
 One of these cans tastes better than the other...
I had never realized just how salty those tomatoes were! They were a bit more acidic than the others, I will say that. Not a bad tomato, and I love most of Sun of Italy's products, but I now know why those San Marzanos cost so damn much.
On to the pasta sauce, which La Lidia and Adam both recommend you should mush up with your fingers.
I did make the mistake of waiting a little too long to mush up those tomatoes. This was a problem because, after starting the pasta water (for my fusilli), I put about eight garlic cloves into a pan of olive oil, then started mushing up the tomatoes - I ended up combining the San Marzanos with one of the Sun of Italy cans. By the time I was done, my garlic was just starting to burn. I salvaged most of it, but had to spoon out a few black slices which floated to the top of my not-too-crushed tomatoes.
It was starting to look less like tomato sauce and more like tomato stew. Don't believe me? Look for yourself:
 Trust me: it's tomato stew.
This was only after I first ate some of it, mind you.
I must have done something right in the end, even with the sprinkles of sugar and cayenne pepper. It did taste good - not as good, I imagine, as if I had only used San Marzano tomatoes and had not burned any of my garlic. But in a mildly salty kind of way, it was a robust and smooth sauce. Especially since I had blended it up. In a big blender.
Besides fusilli, I have been eating it on meatloaf and mashed potatoes. It was alright on the pasta but OH MY GOD it was just wonderful (or as my buddy Jim out in Yucaipa, CA, would say, mostly to irritate me, "exquisite" and "to DIE for"). Yeah, Jim, that one's for you.
Wednesday, August 11, 2010
Green Tomato and Pickle Salsa

My sister made crab cakes last night - with crab meat picked by her own hands - and I saved it for lunch today. As an accompaniment, I was thinking how to use the vegetables and herbs from my garden, and realize that many things in my fridge are things I love to eat fried: green tomatoes (from the garden), pickle chips (not from the garden), and zucchini (from the farmers' market). I saved the zucchini for later, and used the green tomato and pickle chips for the basis of a salsa. Green tomatoes are common in salsas. Pickles are common in relishes, which are kind of like a salsa if you think about it hard enough. But I've not seen green tomatoes and pickles in a salsa together. Well, that's over.
Green Tomato and Pickle Salsa
2 firm medium green tomatoes, diced
4 to 5 sweet pickle chips, diced, or 1 small sweet pickle spear, diced
1 - 2 tablespoons juice from the pickle jar
1 tablespoon lemon or lime juice
3 small green chili peppers, diced (with or without seeds as to your liking)
1 large clove garlic, diced
1/2 to 1 small red onion
1 tablespoon olive oil
salt
several sprigs mint, basil or cilantro, chopped
Fry the garlic, red onion and chili pepper in the olive oil with a little sprinkle of salt over medium heat until soft and slightly brown, to release the flavors. Meanwhile, mix the green tomato, pickles and herb together in the pickle juice and lemon or lime juice. Add the fried items and mix well. Refrigerate.
Note: This salsa is based on stuff I had lying around and was rather cheap for me to make. One thing here or there can be omitted if you don't have it around. You could also experiment to see what might be a good addition. But the green tomatoes and pickle chips are mandatory. I was surprised at how well it turned out. Usually, when I get a last-minute idea for a recipe it does not always turn out too well. The pickles were a nice, surprising addition and the mint seemed to tie the whole salsa together.
Thursday, July 15, 2010
Lunch today
Very simple: chicken salad on lettuce leaves from lettuce I grew myself. The chicken salad is the lovely stuff from Graul's. Yes, it was because I ran out of bread. Now I don't think i can ever eat it with bread again.
Wednesday, June 30, 2010
World Cup - and Plate

I am getting very much into the World Cup going on currently in South Africa. There are eight teams headed to the quarterfinals that start on Friday - Uruguay, Ghana, the Netherlands, Brazil, Germany, Argentina, Paraguay and Spain - and soon enough there will be four. Once we get to those semifinals, I am going to try out (or for lack of time, find) a dish from each of the four semifinalist countries and write about it. And since the games are taking place in South Africa (who didn't even make it to the glorious Round of 16), I'll include a fifth recipe from there, too.
I can't really prepare for it right now, except for the South Africa part. But I can make some guesses: I'm pretty sure at least Brazil is going to make it forward. Did you see that game against Chile? Damn, now I understand just why Brazil is such a soccer - er, football - juggernaut. So there will definitely be something South American posted here at some point soon.
UPDATE 1: Well it looks like I was wrong about Brazil - the Netherlands beat them 2 to 1 today as Brazil just fell apart after the Dutch tied it up. Utter shock, and the five-time World Cup champs go home, while the Oranje - the best team never to win the World Cup - go on to the semifinals. So we have two cuisines of five set: South African and (NOT Brazilian but) Dutch. The only downside: Dutch food ain't that good. I've had it.
UPDATE 2: The field is narrowed again, as Uruguay heads to the semifinals for the first time since 1970, keeping Ghana - and the African continent - from their first ever trip to the semifinals.
UPDATE 3: And the semifinals are now set: the Netherlands will face Uruguay on Tuesday, and the following day the mighty German team will take on perennial never-been-to-a-finals-before-but-still-good Spain.
Sunday, June 13, 2010
Bacon Cook-Off: Bacon & Pancetta Wot
Well, the Great Grapes Bacon Cook-Off is history, and it was a lot of fun! Kit Pollard, Kathy Patterson and I all flexed our bacon muscles for a crowd of dozens of hungry wine lovers, as well as three celebrity judges: WJZ's Bernadette Woods and Jessica Kartalija, and Hugh Sisson of Heavy Seas Beer and WYPR's Cellar Notes. I also got to serve my cook-off entry to my fellow competitors, Dara Bunjon, emcee Greg Nivens and a whole bunch of spectators.
My entry came in second place, which is fine. I went to enjoy myself (which I did)! And the judges said that there was really just a point or two of difference separating all three dishes: Kit's three BLT's and a bacon-infused Bloody Mary (ahem, Kit, I never got to try the Bloody Mary); Kathy's bacon banh mi, and my own Ethiopian-inspired bacon and pancetta wot with tomato and bacon salad. What inspired me to do something Ethiopian-style? Well, with substantial Muslim, Jewish and Ethiopian Orthodox Christian populations, Ethiopia does not feature a whole lot of bacon - or really any pork - in its cuisine. Nevertheless, I was curious to see how well bacon meshed with Ethiopian food. I was pleased with the result, as everyone seemed to be!
You can find the other recipes on Kit & Kathy's websites. Mine is below. Again, thanks to Dara and Greg, and to the audience, judges and of course, Kit & Kathy.
Bacon and Pancetta Wot with Tomato-Bacon Salad
Ingredients: Bacon and Pancetta Wot - Note: Niter Kibbeh (Ethiopian spiced butter), Berbere (traditional Ethiopian spice mix which heavily features hot pepper) and Injera Bread (a large, spongy and sour-tangy pancake made from teff flour that you use instead of utensils to pick up your food) can all be found in Ethiopian markets, the closest of which are in the DC area. I made my own Niter Kibbeh but bought my Berbere and Injera Bread from Woder Ethiopian Carry-Out and Market in Silver Spring. There are markets throughout the DC area, many of which are in Silver Spring, Alexandria, Falls Church and various parts of DC. That said, many sources suggest making your own Berbere (which I did not do) and Niter Kibbeh (which I did. Recipe follows the Wot and Salad recipes). It is far more difficult to make your own Injera Bread, so it is best to find a market to buy it from. There are recipes online, but the bread won't exactly be the same.
1/8 cup Niter Kibbeh (Ethiopian spiced butter) or ghee
1/2 medium yellow onion, chopped
1-2 cloves garlic, chopped
4 slices ginger, cut into pieces and skin removed
3 tablespoons Berbere Spice Mix
3 tomatoes (preferably Romas), diced
6 slices bacon (I used uncured and thick-cut, but feel free to experiment with others, such as applewood smoked bacon or even maple flavored), cut into 1" pieces
4-5 slices pancetta, cut into 1" pieces
1/4 lb ground pork
salt and pepper to taste
Injera Bread
Put Niter Kibbeh in heated pan over medium heat and add the onion, garlic and ginger. Stir fry for about 2 minutes, and then add the Berbere and tomatoes. Continue cooking, stirring occasionally, for 2 to 3 minutes. Add the bacon, pancetta and ground pork (I chopped the bacon and pancetta after I put in the tomatoes, but you won't be working with a time limit so pre-prep to your heart's content) and continue to cook for about 15 minutes. Serve with Tomato-Bacon Salad on Injera Bread. Serves 4 to 6.
Ingredients: Tomato-Bacon Salad - Note: I made less of this for the competition than I liked, so here's a version that will serve 4 to 6 people.
1 tablespoon Berbere
1 tablespoon Niter Kibbeh or ghee
2 -3 slices bacon
4 tomatoes (preferably Romas), diced
1/4 medium yellow onion, or 2 green onions (green and white parts included), chopped
3-4 slices ginger, chopped and skins removed
1-2 cloves garlic, chopped
3-4 chilies (preferably Thai, Serrano or jalapeño), chopped and (unless you're like me and you like the heat) seeded and de-veined
1-2 tablespoons olive oil
Fry bacon sprinkled with Berbere in Niter Kibbeh until crispy enough to crumble, and set aside to drain. Mix all other ingredients together and let sit for a few minutes. Crumble the bacon into the salad. Serve on Injera Bread.
Again, it is probably easier to make your own Niter Kibbeh and Berbere. When I did a test run of the recipe, I made a Berbere spice mix of my own based off of one I found online. I did not use that one during the cook-off, but I think I liked the one I made better. As for the Niter Kibbeh, I made my own based on ingredients from various recipes I found online. Using Julie Sahni's tried and true microwave ghee recipe, I made my own microwave Niter Kibbeh
Ingredients: Microwave Niter Kibbeh - Note: you will also need cheesecloth or a fine strainer for this recipe.
1/2 lb (2 sticks) unsalted butter
4 slices ginger
1/2 tablespoon cloves
1 teaspoon of each of the following:
turmeric, ground
basil, dried
cardamom seeds
cinnamon, ground
methi seeds (aka fenugreek, easily found in any Indian or Pakistani market)
Melt butter in large uncovered microwave safe dish for 1 minute, and add the other ingredients. Cover the dish and microwave for 3 to 5 minutes, depending on the wattage of your microwave. Watch it carefully to make sure it doesn't overflow, or you will be cleaning melted butter out of the bottom of your microwave. Strain into a dish, making sure all solids are removed. May be stored at room temperature.
Monday, March 22, 2010
A Bacon-y Colcannon

When reading Tyler Florence's interpretation of his aforeposted video on how to make colcannon, I decided to try and make it myself, using steamed potatoes, cabbage, scallions, "bacon," milk and butter. Lots of butter. That was the plan last week, but again, stuff happens. I tried to follow the video (and the recipe more or less follows it), but I had one or two changes:
- I halved the recipe at least.
- The recipe calls for a one pound piece of ham or bacon. All I had was Gwaltney bacon. I fried up five pieces in butter (isn't your left arm hurting now?), and threw in a chopped up shallot. About 4 1/2 pieces wound up in the colcannon. This is not what the recipe calls for, but I like this bacon-infused colcannon nonetheless.
- I tried to steam the potatoes, but with no steamer pot I was left with either a bamboo steamer - into which my potatoes would not fit - or a colander over boiling water - which did not work to well. I still had to nuke the potatoes in their jackets for a few minutes to get them to a mashable consistency.
- I put in a little cream in place of the milk.

In the end, I ended up with something that my ancestors probably would have been too poor to make, but is fairly typical Irish cuisine today. Only with bacon as Americans know it.
Monday, January 25, 2010
Food Ethnography on a Budget: Tanzania II: Pombe Ya N'Dizi
After a very busy few weeks, I was able to return to my Tanzanian banana recipe project. True, Tanzanians don't put bananas or plantains in everything. That said, Dorinda Hafner, author of A Taste of Africa, puts it right out there in regards to the cuisine of Tanzania: "You can make an entire meal out of bananas!" That includes appetizers, entrées, side dishes, soups, desserts and beverages. The beverage she offers: banana wine.
Yes, I am currently making wine out of bananas.
To get another perspective on winemaking, I looked up "banana wine" elsewhere on the internet, and got hit in the face with a lot of items specific to homemade winemaking, including Campden tablets, wine nutrients and special "wine yeast." Hafner mentions none of these things - there is yeast, as you will see, but it is simply spread on toast. So honestly, I don't know if this recipe is going to work. And I won't know this for a while. You see, the entire process takes at least three months, though Hafner recommends six in order to get a more flavorful wine. And I'm doing it the way Hafner recommends, which worked for her.
The beverage: Pombe Ya N'Dizi (Banana Wine)
 That measuring cup full of water? You'll need five more of those.
For this project, I had already bought most of the ingredients for the previous project. This includes several unripe bananas. But this project calls for the opposite: very ripe bananas (no standard, plain old "ripe" bananas for me). So really, I had to wait a while to start on this wine after I made the N'Dizi Ya Na Nyama. In addition to the seven thinly sliced overripe bananas, I needed a few other things:
- about 6 liters of water (right out of the tap)
- one slice of soft toast (just a piece of white bread I snagged at the parents' house - I actually don't have any white bread, which is strange)
- one cake of fresh yeast (not active dried - you need it to spread on the toast - this you can find at Giant for about $1.50)
- 4 lb sugar (one bag was about $2.50)
The procedure that Hafner lays out is roughly as follows. First, boil the water. I used my crab pot to do this - too big is better than too little for these sorts of projects. After a good long while, the water will have started to boil. Thinly slice the bananas and add them to the water, boiling them for 20 minutes.
 A beautiful bunch o' sliced banana!
 Strain into a large vessel, add the sugar, and allow to cool. I let mine sit overnight.
 THIS was a pain in the ass.
The cold January moon...
Saw everything...
Once cool, cut the toast into four equal strips, and spread 1/4 of the yeast cake over the front and back of each strip of toast. Drop the yeasty toast strips (mmmm, yeasty toast strips) into the banana-sugar solution, cover with muslin and let sit for a week.
 It places the yeast on the bread or else it gets the knife.
It's been two days since I did this. For now, it sits and waits. But just two days later, it looks really frightening. I love kitchen science!
 Pombe Ya N'Dizi: Day 1...
 ...and Day 2
Really, this is all I have to report on the banana wine project for now. The wine gets strained next week, at which point it gets to sit in an air-tight container for another week before being strained again and left to sit for three more weeks, then left to sit for a month before being strained for the fourth and final time. It then can be bottled and corked until at least three months are up.
So that's it for now. Check back in for the weekly "Pombe Ya N'Dizi" report.
UPDATE JULY 25, 2010 - The wine is done! Read about it in this final update post.


